A shed door is one of the most important parts of your backyard shed. It gets constant use, faces the weather, and needs to stay square and secure. A classic Z-brace shed door is a proven design that resists sagging and is within reach for most DIYers. Whether you are replacing an old door or building one for a new shed, this guide will walk you through the process step by step, with practical tips and key mistakes to avoid.
- Key takeaways:
- Choose weather-resistant materials for long-lasting durability.
- Careful measuring and squaring are crucial for a good fit.
- The Z-brace design prevents sagging over time.
- Seal and paint all surfaces to protect against moisture.
- Use exterior-rated hardware for strength and rust resistance.
- Install hinges and latches securely for smooth operation and security.
Materials
- Tongue-and-groove boards or exterior plywood for the face
- 1×4 or 1×6 boards for the horizontal rails and diagonal brace
- Exterior wood glue and exterior screws (1 1/4 in)
- Three heavy-duty strap or T-hinges
- A latch or hasp and a handle
- Exterior paint or stain
Choosing the right materials is the first step. Tongue-and-groove boards provide a traditional look and create a solid, weather-resistant panel. Exterior plywood is a good option for a flat, modern door. Use pressure-treated or rot-resistant lumber for rails and braces if your shed is in a damp location. Always use glue and screws rated for outdoor use to prevent rust and ensure strength.
Tools
Tape measure, square, circular saw, drill/driver, clamps, level and a pencil. See starting woodworking at home for the basic kit.
- Tape measure: Accurate measuring is crucial for a good fit.
- Square: Ensures all cuts and assemblies are at right angles.
- Circular saw: For cutting boards and panels to length.
- Drill/driver: For making pilot holes and driving screws.
- Clamps: Hold boards together during assembly.
- Level: Helps install the door plumb and level.
- Pencil: For marking cuts and screw locations.
How a Z-Brace Shed Door Works
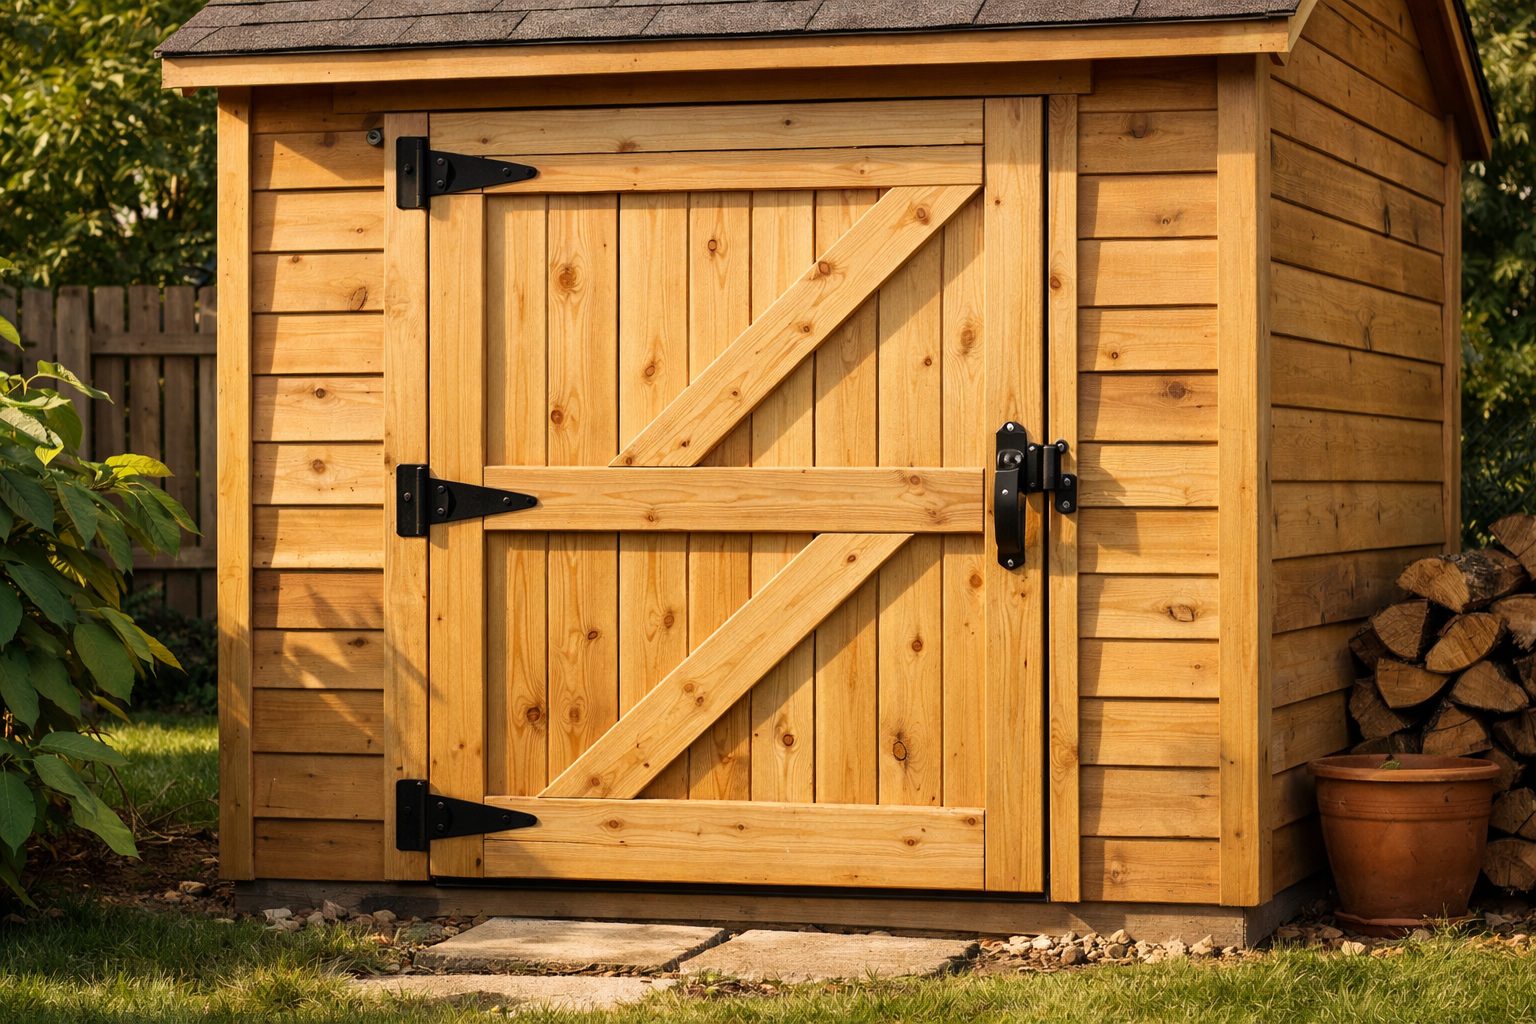
The Z-brace shed door gets its name from the diagonal brace that runs between two horizontal rails, forming a “Z” shape. This design is not just for looks, the diagonal brace transfers the weight of the door to the hinge side, preventing the door from sagging over time. The horizontal rails at the top and bottom tie the face boards together and provide a mounting surface for the hinges and latch.
By running the diagonal from the bottom hinge side up to the top latch side, you create a structure that pushes upward against gravity, keeping the door square. This is especially important for larger or heavier doors, or if your shed is exposed to the elements.
Step-by-step
- Measure the opening. Make the door about 1/4 in smaller than the opening on each side and at the top for clearance, and allow room at the bottom.
- Cut the face boards to length and lay them face-down on a flat surface, edges tight. Check the panel is square by measuring the diagonals.
- Attach the top and bottom rails a few inches in from the ends, with glue and screws into each face board.
- Add the diagonal brace between the rails. It should run from the bottom hinge side up to the top latch side, so it pushes the door upward and stops sagging.
- Seal and paint all sides, including edges, before hanging.
- Hang the door with hinges across the rails, using shims to set even gaps. Check it swings freely, then fit the latch and handle.
Detailed Steps and Tips
-
Measure and Plan
- Measure the width and height of your shed door opening at several points. Openings are rarely perfectly square, so use the smallest measurement and subtract 1/4 inch from each side and the top for clearance. Leave at least 1/2 inch at the bottom if the shed sits on a slab or deck to prevent scraping.
- Sketch your door on paper, noting the direction of the Z-brace and placement of rails, hinges, and latch.
-
Build the Face Panel
- Lay tongue-and-groove boards or plywood face-down on a flat, level surface. For tongue-and-groove, fit the boards tightly together.
- Clamp the boards together to keep them aligned. Check for squareness by measuring diagonals from corner to corner. The measurements should match. Adjust as needed.
-
Install Rails
- Cut two rails to match the width of your door. Place one near the top and one near the bottom, inset a few inches from the ends to avoid splitting.
- Apply exterior wood glue to the contact surfaces, then screw through the rails into each face board or into the plywood. Use at least two screws per board or every 8-10 inches for plywood.
-
Add the Diagonal Brace
- Hold a 1×4 or 1×6 across the door from the bottom hinge side up to the top latch side. Mark where it meets the rails and cut it to fit snugly.
- Glue and screw the brace to each rail and to the face boards or plywood. The brace should be tight, with no gaps, to do its job.
-
Seal and Paint
- Apply exterior primer, paint, or stain to all surfaces, including the top, bottom, and side edges. This step is vital to prevent water from seeping in and causing rot or warping.
- Let the finish dry completely before installing hardware or hanging the door.
-
Hang the Door
- With a helper, lift the door into position. Use shims under and along the sides to set even gaps all around.
- Mark the locations for three heavy-duty hinges, spaced evenly along the hinge side and aligned with the rails and brace for maximum support.
- Pre-drill screw holes to avoid splitting, then attach the hinges to the door and the shed frame.
- Test the swing to ensure the door opens and closes smoothly. Adjust as needed before removing the shims.
- Install the latch, hasp, and handle per the manufacturer’s instructions.

The Weekend Woodworker Starter Pack
Build your first projects with confidence. Inside you get:
- The essential tool list (and what to skip)
- 5 beginner projects with cut lists
- A safety checklist for your workspace
100% free. No spam, unsubscribe anytime. Privacy policy.
Common Mistakes to Avoid
- Not measuring accurately: Doors that are too tight or too loose will stick or be drafty. Measure twice, cut once.
- Skipping the diagonal brace: Without it, even a sturdy door will sag over time.
- Using interior-grade materials: These will rot, warp, or rust quickly outdoors.
- Forgetting to seal all edges: Unfinished edges soak up water and lead to premature failure.
- Improper hinge placement: Hinges must be anchored into the rails or brace, not just the thin face boards.
- Not checking for square: If the door is not square, it may not fit or swing properly.
Tips
- For wide openings, build double doors with a center stop.
- Add a drip edge above the door to keep water out.
- Use exterior-rated fasteners to prevent rust streaks.
- Store your door flat and off the ground until you are ready to install it, to avoid warping.
- Use a weatherstrip or door sweep for a tighter seal if your shed is heated or needs to stay dry inside.
- Prime and paint screw heads to prevent rust.
Checklist: Building a Shed Door
- Measure opening and subtract clearance
- Choose weather-resistant materials
- Cut face boards or plywood to size
- Lay out and square the panel
- Attach top and bottom rails securely
- Install the diagonal brace from bottom hinge side to top latch side
- Seal all sides and edges
- Hang door with three heavy-duty hinges, using shims for even gaps
- Install latch, hasp, and handle
- Test swing and make final adjustments
Plans
For full shed builds, see free plans to build a shed and do I need a permit to build a shed?. Plan collections such as My Shed Plans include door details.
When to Get Help
- If your shed opening is out of square by more than 1/2 inch, you may need to adjust the framing or use a custom-built door for a good fit.
- If the door is unusually large or heavy, consider using a helper or hiring a handyman for safe installation.
- If you have mobility issues or are unfamiliar with power tools, consider seeking assistance for cutting and hanging the door.
Frequently asked questions
How thick should a shed door be?
Most shed doors are between 1 and 1 1/2 inches thick. Using 3/4-inch tongue-and-groove boards with 3/4-inch rails and brace is common. If you use plywood, 3/4-inch exterior plywood plus rails and brace gives a sturdy door. Avoid doors thinner than 1 inch, as they may warp or sag.
Which way should the diagonal brace go?
The diagonal brace should run from the bottom hinge side up to the top latch side. This orientation transfers weight to the hinges and resists sagging. If you install it the other way, the door may sag over time.
How do I stop my shed door from warping?
Use weather-resistant, kiln-dried lumber and seal all sides and edges with exterior paint or stain. Store the door flat and off the ground before installation. Always install a diagonal brace and use exterior-rated fasteners to keep the door rigid.
Can I use a single sheet of plywood for a shed door?
Yes, a single sheet of 3/4-inch exterior plywood can work. Add horizontal rails and a diagonal brace on the inside face for strength and to prevent warping. Seal all edges and faces thoroughly.
How many hinges does a shed door need?
For most shed doors, use three heavy-duty strap or T-hinges. This provides enough support and prevents the door from twisting or sagging. Large or double doors may need four hinges per door for extra strength.
Should I use nails or screws for shed doors?
Exterior-rated screws are better than nails for shed doors. Screws hold more securely, resist pulling out, and make it easier to repair or adjust the door in the future.
The bottom line
Build a square face panel, add top and bottom rails, run the diagonal brace from bottom hinge side to top latch side, seal it well and hang it with even gaps.
Want this as a handy printable?
The Weekend Woodworker Starter Pack
Build your first projects with confidence. Inside you get:
- The essential tool list (and what to skip)
- 5 beginner projects with cut lists
- A safety checklist for your workspace
100% free. No spam, unsubscribe anytime. Privacy policy.
Disclosure: links marked as sponsored are affiliate links. If you buy through them we may earn a commission at no extra cost to you.
Sources and further reading
This guide is for general information only and is not a substitute for professional advice. See our editorial policy.
Products mentioned in this guide
Affiliate links. Results vary. This is not medical advice.